Installation
The traffic library makes an intensive use of pandas DataFrames and of the shapely GIS library.
Static visualization tools are accessible with Matplotlib through the cartes library, which leverages access to more projections and to data from OpenStreetMap. More dynamic visualizations in Jupyter Lab are accessible thanks to the altair and ipyleaflet libraries; other exports to various formats (including CesiumJS or Google Earth) are also available.
Latest release
We recommend creating a fresh conda environment for a first installation:
# Installation
conda create -n traffic -c conda-forge python=3.10 traffic
conda activate traffic
Adjust the Python version you need (>=3.9) and append packages you need for working efficiently, such as Jupyter Lab, xarray, PyTorch or more.
Then activate the environment each time you need to use the traffic library:
conda activate traffic
Warning
Please only report installation issues in fresh conda environments.
Updating traffic
To update traffic in your conda environment:
# -n option is followed by the name of the environment
conda update -n traffic -c conda-forge traffic
For the most recent development version, clone the Github repository:
git clone --depth 1 https://github.com/xoolive/traffic
cd traffic/
pip install .
Note
It should be easier to install the development version inside your conda environment where you installed the latest release.
Contribute to traffic
If you intend to contribute to traffic or file a pull request, the best way to ensure continuous integration does not break is to reproduce an environment with the same exact versions of all dependency libraries.
The following steps are not mandatory, but they will ensure a swift reviewing process:
install uv on your workstation
install traffic with uv:
git clone --depth 1 https://github.com/xoolive/traffic
cd traffic/
uv sync --dev --all-extras  # or just select the extra you need
Then, you may:
prefix all your commands with
uv runor activate the environment located in
.venv
install the pre-commit hooks so a minimum set of sanity checks can be performed and so you can fix issues before continuous integration (GitHub Actions) fails.
uv run pre-commit install
If you work with Visual Studio Code, you can use the Development container that
already contains all the dependencies. Just pull/clone the latest version and
open the directory or the traffic.code-workspace file with VS Code. You
will get a little pop-up message informing you that a Dev Container exists.
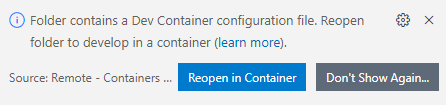
Just click Reopen in Container and VS Code will create and configure the container for you. You can now work in the container with a pre-defined development environment that contains all the dependencies you need.
The provided image runs with uv which will set a proper environment with frozen version of dependencies, a desirable behaviour when you run tests in continuous integration.
Hint
Read more about Docker containers for traffic.